Optimising Images For a Better Website
Images are a vital part of any website. They communicate your brand to visitors and can make people more inclined to buy. So, making the most of your images is really important. They are some of your strongest sales and marketing tools. But, they can also be big and clunky if not dealt with properly. Large files can slow down your website and cause you to lose traffic and leads. Used well, they can boost your SEO efforts. In this post we will look at ways of optimising images so that you minimise the problems and get the most out of your pictures.

Checking For Oversized Images
How do you know if you have a problem? If you are not sure if your images need optimising then you can use website loading speed tests such as GTMetrix, tools.pingdom.com, Pagespeed Insights or the handy suite of tools by experte.com. They will flag up anything that is slowing your site down. In many cases the guilty party is an oversized image file. If you can replace it with an optimised one then when you re-run the test you should notice an improvement.
You can also use various website auditing apps and software to get suggestions for optimisation. Some may list images that are being resized by the software to fit the page (e.g. a 2000 pixel wide image might be resized to 1500 pixels or less if it is too big for its place on the page). So, you can see where resizing and uploading again could offer benefits. Others integrate page speed tests into their audit as well, giving you all the information in one place.

Start Optimising Before You Start Shooting!
I know, this sounds odd. The point is that if you know in advance what job your image is meant to do and what size and format it is meant to be, you can begin optimising for that when your photographer is creating the images. For example, if you know that you want a banner image at a 3:1 image ratio (letterbox crop) then it is best if the photographer knows this for the shoot so that they can create the best quality file for you.
Cropping images to make them fit boxes on your site can result in loss of quality and a weaker composition. Your photographer should be composing your photos carefully so that they look as good as possible. But, unless they know that you want the final image to be a square, they can’t know to compose for that format. So, you risk taking a good photo and making it worse by cropping in a way that wasn’t intended when it was made.
Not only does it affect the composition; it can also result in lower quality files and less detail. If you crop a lot out of an image, then you are throwing away all those pixels and all the details they contain. It is far better to shoot as close as possible to the final size required. That way, you know you are starting out with the best quality and have more choice about the final size on screen and the amount of detail on view.
Ways to Optimise Image Files
Once you have got your images processed and cropped to the right dimensions for your website it is time to optimise the file itself. There are various ways that you can do this. From drag and drop websites to apps, plugins, editing software and even CDN services, there are many ways to optimise your images. Some are free and others are paid services. Let’s have a look at a few possibilities to help you decide.
Optimising By Image Type
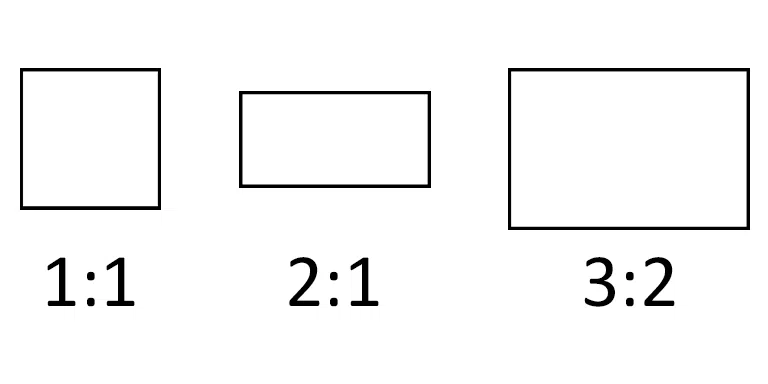
A lot of people default to using .jpg files for all their images. However, this might not always be the best approach if you want to keep the file size small. So, the question is, when might you choose PNG instead of JPEG? Sometimes if you try exporting both formats you will find that one gives you a smaller file than the other. The image showing sample aspect ratios above (1:1, 2:1, 3:2) has been saved to my site as a png. I tried it as a jpg and ran it through a compression plugin to give a result of 18.7KB. The png version is just 7.65KB. A transparent png would have been 8.37KB. Simple graphic images can sometimes make a saving by being a png instead of jpg.
Gradients can sometimes be affected when image files are compressed. This can be visible as banding or in really bad cases as pixellation. In some cases, a png file may show less banding than a jpg. This will clearly be the case when the jpg is saved at a low quality. But it might not be noticeable at a higher quality. In the example below one image is a jpg and the other a png, both come in at 19KB. See if you can notice any difference that might make you choose one over the other.
Online Free Image Optimisation Tools
For a web-based app, you might like to try TinyJPG. You can do a certain amount with it for free, or you can sign up for a paid option to remove limitations. If you just want to optimise the odd file every so often then this site can be a great help. You can drag and drop your file and receive a compressed version in return very shortly after. There are no settings to worry about – everything is automatic. For alternative sites simply do a search for “compress jpeg online” (or jpg – the two terms seem interchangeable).
Standalone Apps or Plugins
If you are regularly compressing images then a better option might be a paid app or plugin, such as JPEGmini. This can work as a standalone app or as a plugin with other software such as Lightroom. It offers more options than some of the online free sites. It still does the compression side of things automatically, but you can choose the size and location of the resulting file. You can either optimise the original file or create a duplicate file, leaving the original intact.
Photoshop and Lightroom have a wide range of options for how to export your files. You can choose the size, resolution and quality levels manually. This can control the look and size of the image file pretty well. However, you may still find that you can make gains without sacrificing quality if you first export using Photoshop or Lightroom and then put the file through another tool/app/plugin.
Although it might be tempting to think that you can just reduce the jpg quality slider right down and get a tiny file, you do make sacrifices in the process! Take a look at the difference between the 2 images below. Both are close ups of a colour gradient. One has much more pixellation and banding than the other. The smoothness of the gradient has been lost completely. That was saved at 10% quality in Photoshop. Clearly you are unlikely to want to use that very often.
Optimising Images Using Website Plugins & CDNs
Some content management systems such as WordPress offer the opportunity to optimise your images when you upload them. If you are a WordPress user then there are plugins available such as Smush or TinyJPG. These can be used to optimise images you already have uploaded and also to process all future uploads. You can often choose the level of compression and in some cases you can choose to make alternative formats such as WebP available.
WebP format enables even smaller file sizes than optimised jpgs. At the time of writing they aren’t compatible with every browser. So, it might be best to offer either jpg or webp to visitors through an automated checking process. WebP facilitates much faster loading times with its tiny file size, so it looks to be the future for images on websites.
CDNs (Content Delivery Networks) are another place where image optimisation can be applied. Services such as Cloudflare offer various means of compressing images or automatically serving WebP format to compatible browsers. A CDN is typically used to accelerate website load times by providing the files at a location that is closer to the end user. So, using a CDN can be beneficial for clients from other areas or countries. The fact that they can optimise your images as well makes it a good choice for a website that is crucial for a business.
Summary
There are so many ways of optimising images that there is bound to be something for everyone that sits nicely in their workflow. If you only occasionally upload images then a free online service may suit you best. Those who do so more regularly and who want a good guarantee of image quality, such as photographers, may wish to look at some of the other options and settings available.
Having a website bogged down by big files is bad for business. If you don’t already, I’d encourage you to find a way of optimising images for your site to keep your pages loading quickly. I am always happy to advise my clients on aspects of image optimisation for online and print use.
© Joe Lenton, August 2022
Have you got your favourite tool for optimising images? Put it in the comments so others can try it too!
